Tuesday, September 4, 2012

Cauliflower crust pizza

I wish I had some great excuse for my lack of recent blogging, or a profound recipe to share with you as an apology. Unfortunately I have neither. What I do have to share though is another low-carb cliche recipe: Cauliflower Crust Pizza.

Quite possibly the best pizza topping combination: pepperoni, shredded linguica, onions, pepperoncini's and pineapple. Plus olives for the husband's portion.


If you've been eating this lifestyle for a while you've either tried it (and probably loved it) or avoided it out of fear. Honestly, I avoided it out of fear for over a year. I tried various options, including low-carb but overly processed flatbreads and crust made from alternative flours. I thought surely those would all be a better solution to my pizza cravings than a cauliflower crust. I was wrong. I'm not sure what clicked in my head to finally venture into the cauliflower world, but I'm so glad I did. 

You may or may not taste something "different" in this crust, but there's no definitive cauliflower taste. Hands down it's the best substitute I've found to cure those pizza cravings. The potential off taste is easily masked by the tomato sauce, cheese and your toppings of choice. The only real downsides are that it's hard to photograph and that it's difficult to eat without a fork. Who cares, right? Not me, that's for sure. I can almost guarantee you won't care either.

Cauliflower Crust Pizza
Adapted from Recipe Girl
Serves 2

Ingredients
2 cups shredded cauliflower
1 large egg
1 cup cheese (preferably a combination of mozzarella, parmesan and cheddar)
1/2 t basil
1/2 t oregano
1/4 t garlic powder
1/4 t onion powder
Pizza toppings of your choice

Directions
Preheat oven to 400 degrees.
Take a head of cauliflower and shred until you have 2 cups worth. It won't take a full head, so plan on using the extra for another meal or make extra crust. We use a cheese grater for this step.
Spread out cauliflower on to cookie sheet lined with parchment paper. Bake for 10-15 minutes, or until the cauliflower is just starting to brown. Remove from oven and let it sit for a few minutes to cool.
Place the cauliflower into a mixing bowl and combine with egg, cheese and seasonings. 
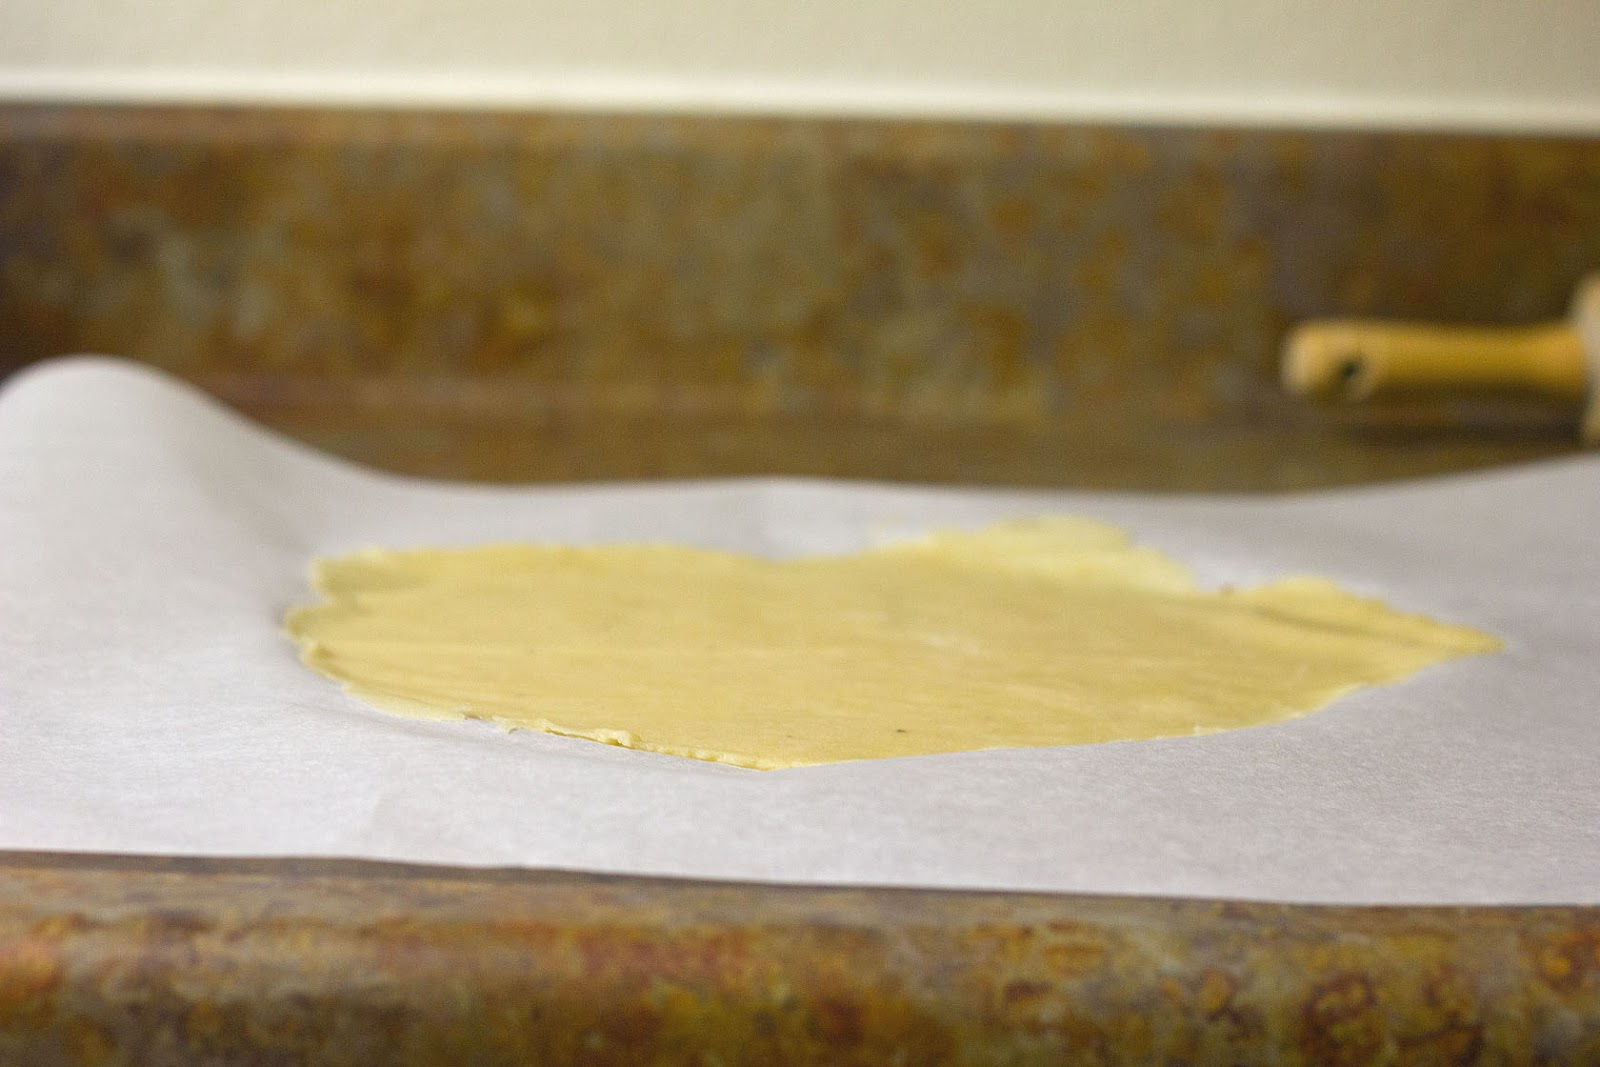
Place cauliflower mixture on to a fresh piece of parchment paper, spreading it as thin as you can without creating holes in the crust. Bake for another 10-15 minutes, or until it starts to develop a golden brown color throughout.
Remove crust from the oven and set the oven to broil. Apply pizza toppings and place back in oven for approximately five minutes, or until cheese topping is fully melted. Careful, the edges of the crust can easily burn at this stage.
Enjoy!

Nutrition facts per serving (crust only):
266 Calories; 17g Fat; 8g Carbohydrates; 3g Fiber; 21g Protein
Tuesday, July 24, 2012

Spatchcock Pastured Chicken

One of the drawbacks of getting our own chickens, if you could call it that, is being able to see how happy chickens are when they get to be real chickens. Grazing in the yard, eating bugs, flying around and chasing each other. We've spent countless hours just sitting out back watching the chickens do their thing. Needless to say, it didn't take long before we decided there was no way we could ever eat another factory farmed chicken. We needed to find chickens that lived a natural chicken life, not stuck in a square foot cage never seeing the light of day. Enter Noah Patridge and Emily French of New Roots Farms. We found them through craigslist and were so impressed we purchased 10 of their pastured chickens. It was almost overwhelming trying to decide how we should prepare the first one. Typically our whole chickens get roasted in the oven, but this was a particularly warm day so grilling was the method of choice. To shorten the cooking time we "Spatchcocked" the chicken before grilling.

Spatchcocking:
Step 1
1. Use kitchen shears to cut on both sides of the backbone and remove the spine
2. Leaving the chicken on its belly, turn it so that the drumsticks point away from you.
3. Cut through the piece of white cartilage just below the skin at the base of the breastbone, on the end of the chicken nearest you.
4. Grab the outside edges of the chicken and bend down while pushing up in the middle like you're trying to break the chicken in half. Bend until you hear it crack.
Step 5
5. Run your finger down both sides of the breastbone to loosen it from the skin and pull it out. Mine came out in two pieces.

You have now spatchcocked a chicken and are ready to cook it. First turn it over then rub it down with olive oil or melted butter. Then choose your seasonings. Through much trial and error we've found that something simple like lemon pepper and salt, or garlic salt and cajun seasoning is best.

On the grill
Prepare the grill for indirect cooking by lighting the outside burners but not the middle, or just the burner on one side if your grill has only two. If you have a charcoal grill I'm going to assume you know how to apply this method to your BBQ. Throw the chicken over the unlit burner and cook until done (use a meat thermometer in the thigh or breast. I pull the chicken off when the thigh reads 165F but am not responsible if you get sick! Check the internet if you need more info). Pull it off the grill and let it rest for at least 5 minutes, preferably 10, then cut apart.  The wings make a good snack while carving the rest of the chicken.The legs (thigh and drumstick combo) come off easily as one piece and make a good size dinner portion for one person. In our situation the breasts are usually reserved for leftovers to go on a salad or in another recipe like Alfredo or Peanut Sauce Stir Fry.


Almost done, I promise...side dish time. We call this Salty Garlicky Vegetables. In this case it was Salty Garlicky Bok Choy but just as often happens with regular cabbage or green beans (a favorite). It's easy and delicious.


Chop 1 head of Bok Choy into bite sized pieces
Heat 1-2T cooking fat of your choice in a skillet (I prefer bacon fat for this dish but ghee works just as well) on medium heat
Add the cabbage
Cook until 75% done
Add 1T minced garlic (more or less depending on your taste but the point of this is to be borderline too garlicky)
Add about 2T of Tamari (or soy sauce or coconut aminos depending on your diet choices, but again the point is to be borderline too salty)
Cook for a few minutes until some of the liquid has evaporated/thickened
Serve immediately


Thursday, June 28, 2012

Chicken update

Much like all living things, our cute, fuzzy baby chicks are almost all grown up. When I first mentioned our chickens, they were only a few weeks old and just experiencing what it was like to go outside for the first time. They’ve experienced even more big changes since then.

Around five weeks they got to spend their first night outside in the coop. It was difficult for everybody. They acted like they wanted to go back to the safety of the brooder and our living room, but we tried that the night before and it just wasn’t going to happen a second night. I’m also a sap so tough love isn’t really my thing. Thankfully we all got through the experience unharmed.

The flock at five weeks.
From left to right: Tina, Butters, Sara, Whitney.
Tina being held at 5 weeks.
A few weeks later they were moved to a new, more secure coop and run. They learn quickly, and it only took one night of us walking them up the ramp before they got the hang of it themselves. Of course, they were still sleeping in the nest box (a habit they kept from their old coop) which is a no-no. Teaching them to roost was a far lengthier process, but after a few evenings of me physically putting them repeatedly on the roost they eventually got the hang of it too.

So far one of the most surprising parts of owning chickens is learning how each of them have their own personalities. Some of this is breed specific (for example the Ameraucana’s are far friendlier than the Barnevelders), but not all of it. Tina just wants attention, and even hung out on my husband’s lap for a few minutes last weekend. Butters seems generally confused a lot of the time, and loves to take dust baths more than anybody. Whitney is extremely food driven (then again, so is Tina). Sara is very independent, and far more likely to wander around the yard on her own than in the herd. All of them, however, love to be let out of their run. Exploring is their favorite activity, but we have to keep a watchful eye on them. It’s all downhill once they discover the garden has delicious veggies.

Speaking of food, it’s entertaining to see how receptive they are to new treats. So far dried mealworms are the biggest hit, but they also love corn, cauliflower, yogurt, and heads of cabbage. They also enjoy loose leaves of cabbage and spinach as well as fruit, but they aren’t favorites. The only food they haven’t really liked yet is lettuce.

We’re still a month away from getting any eggs, but I’ll be sure to update when we get our first one!


The flock at 12 weeks. Left to right: Sara, Butters, Tina, Whitney.

Tina being held at 12 weeks.
Tuesday, June 26, 2012

Sloppy Bobs

Now that we've been eating on our half a cow for six months, some of the usual meals are becoming a bit tiresome, particularly in the ground beef department. While perusing the internet for recipe ideas I was reminded of the classic Sloppy Joe. Except there's no can of Manwich involved, and most importantly it's not over a bun. To avoid confusion, we've affectionately renamed this dish Sloppy Bob.


It's common for us to adapt recipes, but rarely do they come out perfect on the first try. Usually it takes a few tweaks to get it just right. This time we got it dead on. It has the perfect amount of spice, sweetness and tanginess. 

If you want you can serve it over a bed of spinach or other greens, or perhaps a paleo coconut bun. But frankly, there's no need. It's just that good.

Sloppy Bobs
Adapted from Paleo Perfect
Serves 4

Ingredients
1 pound ground beef (or other ground meat of your choice)
1 T bacon grease (ghee or coconut oil would also work)
1 medium shredded carrot
1/2 large onion, minced
1 jalepeno, diced
8 oz can tomato sauce
3 T tomato paste
2 T cider vinegar
1/2 T garlic, minced
1/2 t onion powder
Pinch of ground cloves
1/8 t ground all spice
1 T honey
1/2 t salt
1/2 t paprika
1/4 t black pepper
1/4 t dry mustard
1/4 t chili powder
1 t balsamic vinegar
1 t tamari
2 T ketchup

Directions
In a large skillet over medium heat, heat bacon grease until melted. Add in ground beef, and cook until halfway done. Add the vegetables and cook until they are about 80% done. Next, add in the dry spices and wet ingredients. Simmer for about 10 minutes. Serve and enjoy!

Nutritional Information
400 Calories; 26g Fat; 19g Carbohydrates; 3g Fiber; 22g Protein.

Tuesday, June 5, 2012

Peanut Sauce Stir Fry

Back when we ate fairly unhealthy, stir fry was a great way to ensure we got our vegetables in for the day. Of course it was the standard soy-based sauce, but it still made for a tasty, veggie-filled meal.

Thanks to our current eating habits, we don't exactly need to force the veggies down. However, stir fry has remained a popular item on the weekly menu rotation. One day to change things up, we experimented with a peanut sauce. Both of us had eaten it at least once before, but it wasn't anything special. But oh man. We both love it now. In fact, I couldn't even tell you the last time we had a soy-based stir fry.


If you avoid peanuts for dietary or allergy reasons, you can still make this with alternative nut butters. We've only replaced it with almond butter, though I'm sure others are equally fine.

Peanut Sauce Stir Fy
An All Meat and No Potatoes Original
Serves 5

Ingredients
One pound chicken breast
One pound of veggies. The frozen bags of stir fry veggies are great, or you can create your own with any combination. We like bean sprouts, water chestnuts, broccoli, zucchini, bell peppers, etc.
1/2 cup peanut butter or alternative nut butter
3 tablespoons tamari or soy sauce
2 tablespoons rice vinegar
1 tablespoon ketchup
1 tablespoon chili-garlic sauce

Directions
In a large skillet, saute chicken until mostly cooked through and add vegetables of your choosing.
Meanwhile, mix the peanut butter, tamari, rice vinegar, ketchup and chili-garlic into a small bowl. Once the chicken and vegetables are cooked thoroughly, add the sauce mixture and stir until the chicken and veggies are fully coated.

Nutrition Information
359 Calories; 49g Fat; 12.2g Carbs; 3.28g Fiber; 26g Protein
Wednesday, May 30, 2012

Mexican Casserole

Thanks to the 100-plus pounds of ground beef from "Bessie" we're always looking for new recipes. While this Mexican Casserole isn't drastically different than just eating a taco, it's just different enough that it has earned a spot in our meal plan on a couple of occasions now. It may not look particularly appetizing, but it's definitely tasty.


Mexican Casserole
An All Meat and No Potatoes Original
Serves 6

Ingredients:
1 pound ground beef
1 medium onion, diced
1 large jalapeno, diced
2 gloves garlic, minced
Taco seasoning of your choice
1 pint crushed tomatoes
1 (7.75 ounce) can of El Pato Jalapeno Salsa
3/4 cup sour cream
3 taco sized sprouted corn tortillas (or whichever corn-based tortilla you prefer)
8 oz mexican-blend cheese
Queso Fresco (optional)
Cilantro (optional)

Directions:
In a large skillet, cook ground beef. When it's approximately halfway done, add the onion, jalapeno, garlic and taco seasoning. When the veggies and beef are fully cooked, pour into a large mixing bowl. Add in tomatoes, jalapeno salsa and sour cream. Mix thoroughly.
In a deep casserole dish, place 1/3 of ground beef mixture as the bottom layer. Next add 1/3 of the cheese followed by 1/2 of the tortillas. We find it works best if these are ripped into smaller pieces. Repeat the layers once more. For the third and final layer, place the remaining ground beef and cheese. If you prefer, you can replace the mexican-blend cheese with queso fresco for the top layer.
Bake, covered, at 350 degrees for 20 minutes. Remove cover and bake for another 5 minutes. If desired, you can broil for an additional 3 minutes to get the cheese nice and golden.
Serve with freshly chopped cilantro if desired.

Nutritional information, per serving:
459 Calories; 33g Fat; 16g Carbohydrates; 2g Fiber; 24g Protein
Tuesday, May 22, 2012

Noodleless Fettuccine Alfredo Sauce

Back in the days when I gorged myself on carbs, Fettuccine Alfredo was one of my favorite dishes. Thankfully we've managed to come up with a great recipe that cures my pasta cravings without having to actually eat wheat-filled noodles.


This recipe is actually a combination of two recipes we've enjoyed. One uses cream rather than skim milk, while the other adds cream cheese which helps keep it together for leftovers. The biggest problem with standard Fettuccine Alfredo is that it all the oil separates when it's reheated the next day, making for a subpar lunch. This recipe doesn't have that problem.

While the sauce could be used over anything, they key to making it as a pasta substitute is the veggies. We use lots of onions and broccoli, but you could just as easily include zucchini noodles or your faux-noodle of choice.

Noodleless Feffuccine Alfredo Sauce
Adapted from MattWP10's alfredo sauce on Linda's Low Carb and Dinner and Dessert
Serves 4

Ingredients:
1 large chicken breast, diced
1 head broccoli, chopped
1 medium onion, sliced
4 tablespoons butter
3 cloves garlic, minced
1/4 teaspoon pepper
2/3 cup heavy cream
1/3 cup half and half
2 tablespoons cream cheese
3 ounces parmesan cheese shredded
2 ounces mozzarella cheese, shredded

Directions:
In a large skillet, add butter and chicken and cook over medium-high heat. When it's close to done, add the onion, garlic and broccoli and saute for 5 minutes.
Next, add in the pepper, heavy cream, half and half, and cream cheese. Stir for 5 minutes, or until sauce thickens. Add in the parmesan cheese, stirring with a whisk until fully melted. Finally, add in the mozzarella and also stir until melted. This can get very thick, so you may want to add a splash of water if it's too thick for your liking.

Nutritional information, per serving:
510 Calories; 35g Fat; 21g Carbohydrates; 5g Fiber; 30g Protein

Weekly menu for May 18-24

Here's the menu for this week:

Friday, May 18: Chili
Saturday, May 19: Crockpot Shredded Pork with Red Slaw
Sunday, May 20: Out
Monday, May 21: Leftovers
Tuesday, May 22: Peanut Sauce Stir Fry
Wednesday, May 23: Tacos
Thursday, May 24: Pork Chops and Asparagus
Wednesday, May 16, 2012

Buffalo Chicken Wings

Sometimes the simplest things to make are also the tastiest. Such is the case with Buffalo Chicken Wings. Pretty much all you have to do is bake some chicken wings, pour sauce over them, and devour them until your lips are on fire from the spicy sauce. You don't even need cooking skills to enjoy this meal.


We prefer the Original Frank's over the Buffalo Wing Sauce based only on the ingredient list. If you don't mind the few extra ingredients in the Buffalo Wing Sauce, this recipe is even easier. Simply open the bottle and pour over the cooked wings.

Buffalo Chicken Wings
Slightly adapted from Frank's Red Hot

Ingredients:
Chicken Wings (You can buy these frozen or fresh, just be sure to remove the tips if they come included.) We plan on an average of 7 wings per person.
2/3 cup Frank's Red Hot Original
1/3 cup butter

Directions:
Preheat oven to 425 degrees.
Place wings on cookie sheet covered with parchment paper and bake for 45 minutes.
With ten minutes remaining in the baking time, combine Frank's and butter in a small pan over medium heat.
Place the finished wings in a bowl and pour the sauce over them and stir.
Serve and enjoy!

Weekly menu for May 11-17

I realize this is coming way late in the week, but here's what we've been eating the past few days.

Friday, May 11: Bunless burgers (these got pushed back a day from last week)
Saturday, May 12: Noodless Alfredo
Sunday, May 13: Red snapper with mango salsa, salad and couscous (Mother's Day meal)
Monday, May 14: Chicken wings
Tuesday, May 15: Beef curry
Wednesday, May 16: Cauliflower pizza
Thursday, May 17: Chicken thighs
Friday, May 11, 2012

Sour Cream Chicken Enchiladas

As I mentioned last week, there's really only two meals I'm semi-responsible for putting on the table. The first being Spaghetti Sauce, and the other are these Sour Cream Chicken Enchiladas.

We served these with fresh tomatoes and cilantro. And a Corona Light
because it was Cinco de Mayo and we're cliche like that.
I've been eating them for years, as this is another recipe that's been passed down to me from my mom. I again have no idea where they came from, although for some reason I feel like I've seen it in one of my cookbooks. Taste of Oregon rings a bell.

Regardless of where it originated, these enchiladas are delicious. In fact, because of these bad boys I no longer have a desire to ever eat the standard red-sauce variety ever again. It's not that the standard version is bad per say...these are just that good.

These do take a bit of time to make, so I recommend assembling them the night before if it's a week night.

Sour Cream Chicken Enchiladas
An All Meat and No Potatoes original

Ingredients
2 chicken breasts
1 cup sour cream
1 can of cream of chicken and mushroom soup
1 can of diced green chilies
1 1/5 cups of Mexican blend cheese
9 soft taco size tortillas
2 jalapenos (optional)
1/2 medium onion (optional)
5 mushrooms (optional)

Directions
Preheat oven to 350 degrees.
In a medium sized pot, boil the chicken until cooked thoroughly. Shred into small pieces and set aside.
While the chicken is cooking, saute jalapenos, onion, mushrooms or whatever veggies you like. Once cooked, set aside to let cool.
Meanwhile, combine sour cream, soup and green chilis. Add the vegetable mixture once cooled. Set aside approximately 1 cup of the sauce mixture. In the larger portion of sauce, add the chicken. Often times I don't quite use the full amount of chicken so use your judgement here.
In a tortilla shell take one or two spoonfuls of the chicken mixture and sprinkle with a pinch of cheese before rolling it up. Place in a 9 x 13 pan and repeat until you run out of the chicken mixture. This seems to be about 8 or 9 tortillas.
Once all the tortillas are in the pan, cover with the remaining cheese.
Bake at 350 degrees for 25 minutes.


Tuesday, May 8, 2012

Weekly Menu for May 4 – 10

This week's dinner plan is full of delicious standbys in our household. Stay tuned later this week for a post on the Sour Cream Chicken Enchiladas.

Friday, May 4: Salmon with homestyle sweet potatoes
Saturday, May 5: Sour Cream Chicken Enchiladas
Sunday, May 6: Pot roast with mashed potatoes
Monday, May 7: Barbecue Chicken thighs with cottage cheese
Tuesday, May 8: Ground Beef Tacos
Wednesday, May 9: Steak with mushroom fish sauce
Thursday, May 10: Bunless Burgers
Wednesday, May 2, 2012

Spaghetti Sauce

I should probably come clean about something. Despite the fact that I have this food blog, I don't actually do much cooking. I help out, and take care of the dishes, but the real chef in the family is my husband. He's really the one making all of these delicious meals I keep talking about. There are about two exceptions to this: Spaghetti Sauce and Sour Cream Chicken Enchiladas (which I'll post about next week). These were really the only two good recipes I brought into this marriage, so I'm more likely to be in charge of these over anything else we eat.

The spaghetti sauce recipe comes from my mom. She's been making it for as long as I can remember. We've slowly adapted it to our own recipe, since the original involves a couple packets of Lawry's spaghetti sauce packets (full of crap like modified food starch and hydrolyzed soy protein). It's easily just as good, and far better for you. It's also extremely cheap to make and makes about 12 servings of sauce. Be sure to clean out some freezer space before making this dish. We find it freezes best in the glass quart canning jars.

We've been serving this over zucchini noodles, making it full of nothing but healthy vegetables and some protein from the meat.


Spaghetti Sauce
An All Meat and No Potatoes Original

Ingredients
1 pound ground beef
1 pound italian sausage
1 large onion
1/2 head garlic
10 mushrooms, sliced (or more based on personal preference)
80-90 ounces of crushed tomatoes (Check Costco for a big ol' jar for under $3!)
1 teaspoons kosher salt
Cracked pepper - a few twists
1.5 teaspoons thyme
3 teaspoons basil
2 teaspoons oregano
4 teaspoons sugar
1/2 teaspoon onion powder
1/2 teaspoon garlic power

Directions
In a large dutch oven or deep pot, fry the ground beef and italian sausage. When it's almost down, add onion and garlic. Saute until onion is soft.
Add tomato sauce and spices. Mix everything together, then add the mushrooms.
Simmer for one hour, stirring regularly.
Tuesday, May 1, 2012

Weekly menu for April 28 - May 3

Here's what we've got cookin' this week!

Saturday, April 28 - Cauliflower crust pizza
Sunday, April 29 - Out
Monday, April 30 - Orange chicken
Tuesday, May 1 - Spaghetti
Wednesday, May 2 - Pork chops
Thursday, May 3 - Shepherd's Pie
Thursday, April 26, 2012

Chicks, man.

Just before Easter we decided to take the plunge and become parents...to chickens that is.

We've talked about it for some time, but we finally have the space and our backyard is starting to come together enough that the timing was right. After doing some research we felt prepared enough to go to our local urban farm store and pick out some girls.

The first trip outside, around three weeks old. From left to right: Tina, Butters, Whitney (in back), and Sara.
Legally we can have up to six chickens, assuming none are a rooster. We figured three is a good starting number, but purchased four in case one turned out to be a rooster or something more unfortunate. Three weeks later I'm happy to report all are alive and well, but I've got my eye on the big one for fear it turns out to be a rooster.

While these chickens are primarily for a food source of delicious fresh eggs, we also want them to be friendly towards humans. With that in mind we picked out two highly-regarded breeds.

Two of the girls were sold as Ameraucana's, although apparently there's controversy over the likelyhood they are "pure-bred" or the mutt variety among the chicken snobs. Regardless, these girls will lay what are called Easter Eggs. The shells are typically varying shades of blue and green, but inside everything is normal. Ameraucana's lay an average of 5 eggs per week, but drop down to about 1-2 eggs per week in winter. Full grown they average 5.5 pounds. However, we have one girl that is particularly small. It's possible she's just a runt, but she could also be a bantam, which would put her at only 1.5 pounds full grown. Of the two breeds, these girls seem to be more interested in human interaction.

The second breed we purchased is a Barnevelder. They are famous for laying large, dark brown eggs but most picture's I've seen don't necessarily reflect that. Barnevelders will grow to a slightly larger size, averaging 6-7 pounds as an adult. They will also produce more eggs than the Ameraucana's. They too will lay around 5 eggs per week, but in the winter that number doesn't trail off as drastically.

In the coming weeks I'll post more about raising them, building a coop, etc.
Tuesday, April 24, 2012

Weekly menu for April 21-27

Here's what's on the menu this week!

Saturday, April 21: Family BBQ. We had salmon, ling cod, crab, shrimp, salad and grilled veggies.
Sunday, April 22: Hamburgers (despite being on the menu for weeks, this is the first time we actually ate them).
Monday, April 23: Chicken Curry
Tuesday, April 24: Steaks. No side dish planned at this point.
Wednesday, April 25: Chicken wings!
Thursday, April 26: Big salad
Friday, April 27: Stroganoff
Sunday, April 15, 2012

Weekly menu for April 15 - April 20, 2012

Here's what's for dinner in our house this week.

Saturday, April 14: Cauliflower crust pizza
Sunday, April 15: Noodless fettuccine alfredo
Monday, April 16: Kielbasa and fried jicama
Tuesday, April 17: Ground beef tacos
Wednesday, April 18: Chicken thighs
Thursday, April 19: Burgers (we ended up not making these last week)
Friday, April 20: Curry
Friday, April 13, 2012

Bunless burgers

There's a lot of burger lovers out there, and a large number feel that the bun should be carefully considered. Plain white? Wheat? Potato? Well, I feel pretty strongly about my bun choice as well...except by preference is non at all.

While I resisted the idea of a bunless burger at first, it didn't take me long to realize that was the way to go. Turns out the bun is just a limitation! It keeps you from being able to put on large quantities of toppings, or a variety of sauces that just get soaked up into the bread. 


Without the bun, you are only limited by your imagination. This particular burger had lettuce, spinach, onion, pickles, avocado, ketchup, mustard, worcestershire sauce, and two kinds of cheese (and an egg, but it didn't look as pretty). 

Wednesday, April 11, 2012

Weekly Menu for April 7-13

I realize this post is coming a little bit late in the week, but we got baby chicks on Saturday afternoon so needless to say I've been a little distracted by the cuteness. I'll be sure to do a full post on the girls later.

Here's what we've been eating/have planned for the remainder of the week:

Week of April 7-13, 2012
Saturday: Hamburger Parmesan
Sunday: Ham, creamed potatoes, salad
Monday: Steak and roasted asparagus
Tusday: Chicken Tikka Masala
Wednesday: Big ass salad
Thursday: Leftover Tikka Masala
Friday: Hamburgers
Saturday, March 31, 2012

Weekly menu for March 30-April 5, 2012

We have found that the biggest key to successfully eating healthy is planning. We never used to plan our meals in advance, and found ourselves eating fast food or junk like Hamburger Helper way too often. Now that we plan our meals up to a week in advance we save money, eat much healthier, and have nearly eliminated all waste from un-used food.

With that in mind, I'll be updating this blog weekly with our meal plan for dinners. It won't always be Sunday-Saturday since we don't make our list on the same day. You'll find we've got a host of standbys but also like to try new recipes. Over time I'll provide recipes for our favorite meals, and perhaps they can provide inspiration for your weekly meal plan too.

Week of March 30-April 5, 2012
Friday: Bass and red slaw
Saturday: Steak and asparagus
Sunday: Enchilada casserole
Monday: Pot roast
Tuesday: Ground beef tacos
Wednesday: Chicken curry
Thursday: Pork chops and green beans
Tuesday, March 27, 2012

Sweet Potato Fries

There are certain foods that most folks eating a paleo diet indulge on – sweet potato fries being one of them. Having never eaten a sweet potato in my life, I didn’t understand how these could replace the craving for my standard, salty, starchy fries. There are a lot of foods I miss that I can find suitable replacements for, but most aren’t as good as whatever I’m trying to replicate. Do sweet potato fries taste just like regular fries? No, of course not. But they do taste super good and have nearly eliminated my desire for the fries I used to like so much.


Since discovering these tasty fries a few months ago I’ve been consuming them largely as an evening snack. However, I’ve also eaten them as a small lunch on weekend days when I’m not particularly hungry. While it’s not something I’m going to make a habit of, it’s a great way to get some extra vitamins. One sweet potato contains 13% of your daily potassium, 15% of your daily fiber, and a whopping 369% of your vitamin A. It’s also a good source of vitamin B6, manganese, copper and a few others.

The last thing to take note of is that there are two different kinds of sweet potatoes sold in your average grocery store. There is the orange-skinned variety, often called yams, or the pale-skinned variety. We prefer the pale-skinned.

Sweet Potato Fries
Source: Inspired by lots of blogs, perfected by us

Ingredients
One sweet potato
Olive Oil
Salt and Pepper

Directions
Preheat oven to 400 degrees.
Peel and cut sweet potato into strips. It’s quite dense, so make sure you have a good knife and possibly somebody strong. In a medium sized bowl, drizzle with olive oil and toss. Dash on some salt and pepper and toss again.
Place neatly onto a cookie sheet line with parchment paper. Bake for 18-22 minutes, turning halfway through. They’ll still be somewhat soft depending on how thick you cut your slices. They are still delicious though!
Tuesday, March 13, 2012

Short Ribs with Wine and Cream

A few months ago I was looking for a special recipe for Travis and I to make together. I don’t remember what the occasion was, but whatever it was, Pioneer Woman’s Short Ribs with Wine and Cream fit the bill. Ironically I dislike fatty cuts of meat and I’m still in denial about my newfound love of mushrooms, so what possessed me to choose this recipe I’m not quite sure. It was indeed a bit too fatty for my tastes, but Travis was in love with this meal. In fact, as soon as we brought home our 1/2 cow, he requested we remake the meal.

We were hungry, and didn't cook these as long as we should have.
If we'd gone the full three hours, more of the fat would have melted off. 

I’m still not a huge fan of the fat content, but I can’t deny it’s a tasty recipe. It’s rich, tender, and has excellent flavor. I even like the mushrooms. Honestly, I don’t think you can even improve on the recipe. I do highly recommend finding an assortment of mushrooms as the recipe suggests. Our local Safeway strangely only had cremini and portabellas in stock, and the lack of variety was definitely noticed.

It is important to note that we specified our short ribs be cut English style. It seems the more popular cut is Flanken style.


While this was a great meal for the two of us, I could definitely see serving this to guests in the future. It’s largely hands-off due to the three hour simmer time, but comes across as one something much more elaborate. It’s sure to impress at a dinner party.

Short Ribs with Wine and Cream

Ingredients
12 whole Shortribs
Salt and pepper, to taste
1 1/2 tablespoons bacon grease
1 cup red wine
32 ounces, fluid beef broth
1/2 teaspoon dried rosemary
2 tablespoons grainy mustard
1 cup heavy cream
2 tablespoons capers
16 ounces by weight of assorted Mushrooms: Cremini, Oyster, Baby Bellas, Etc.
Olive oil, for drizzling

Directions
Preheat oven to 300 degrees.
Heat bacon grease in a dutch oven over high heat. Sprinkle salt and pepper on three sides of the ribs. Quickly sear the meaty sides of the ribs, about 1 1/2 minutes per side. Remove the short ribs to a plate.
Pour wine and beef into the dutch oven. Add rosemary. Stir to combine, scraping the bottom of the pot to deglaze. Return short ribs to the pot, cover, and place in the oven for 3 hours.

After they have cooked, remove the pot from the oven and increase the temperature to 400 degrees. Arrange the mushrooms in a single layer on a baking sheet with parchment paper. Drizzle with olive oil and sprinkle with salt and pepper, then roast the mushrooms until they're golden brown, about 15 to 20 minutes.
Meanwhile, place the dutch oven a stove burner and carefully remove the short ribs from the pot again. Stir in mustard, cream, and capers, then raise the heat and allow it thickened a bit. Return the short ribs to the sauce, put on the lid, and turn off the heat.
Serve the short ribs on top of the mushrooms, then drizzle with extra cream sauce.

Sunday, February 26, 2012

Bringing Home Bessie

Both my husband and I are in agreement that there is more to healthy eating than just
eating healthy fats and vegetables and omitting grains and sugar; eating local food is also
part of the equation as well.

In general we do a pretty good job of this on our own. We have our own garden during
the summer months and regularly have a freezer full of freshly caught steelhead, bass and
trout. We also hunt deer and elk, but after a disappointing and unsuccessful season we
were interested in purchasing half a cow (who we've since named Bessie).

On one of his recent hunting trips to eastern Oregon, my husband was listening to a radio
station when an advertisement came on for a ranch that fertilizes the grass the cows eat
with leftover “waste” water from local brewers. They cows are also fed beer mash of
wheat, hops and barley as they become older. We could have opted for a cow that was
100% grass fed, but as beer lovers we thought this would be the perfect starting point.
The entire process was incredibly easy. We simply filled out a form on the rancher’s
website and waited for a cow to be ready. The butcher called once it was ready and we
were able to specify exactly what cuts of meat we wanted along with their preferred
package size.

Our half cow weighed 450 pounds hanging weight, and at $3 per pound hanging weight our total came to $1,350. In exchange we received:

109 packages of ground beef (approximately 1 pound per packages)
7 packages of New York steaks
5 packages liver
4 packages Tenderloin steak
12 chuck roast, approximately 3 pounds each
3 Bottom Round Roasts
6 Top Round Roasts
1 Rump Roast
1 Heart
1 package of Stew meat
5 packages Top Sirloin Steak
5 packages Sirloin Tip Steak
6 packages of Ribeyes
4 packages of Short Ribs, cut English Style
1 Brisket
4 package of Soup Bones
2 packages of suet, approximately  five pounds each

All of the meat was (barely) able to fit into a 15 cubic foot freezer we bought especially for the occasion. So far we've tried the ground beef, New York steaks, Ribeyes, Chuck Roast and Sirloin Tip. It's not the most tender steak I've ever had, but that was to be expected. I'd trade that extra bit of tenderness for a local, grass-fed cow any day. 

Sunday, January 29, 2012

Almond Thins

One of the hardest parts of eating a low carb, paleo diet is the lack of convenience foods available. I’m often running behind in the morning so I need to be able to grab something for lunch quickly, and pre-packaged foods used to be a common solution. I could just grab a box of crackers or a bag of chips, throw some food in a zip lock and be on my way.


My new eating habits definitely require a bit more planning and preparation. I can still have my grab-and-go lunch foods, I just need to prepare them in advance. One of my favorite options are the Almond Thins from Linda’s Low Carb. They are very easy to make and are way more nutritious than the boxed versions from the store. I always make a double batch so there is plenty to go around for an evening snack with cheese or to throw into my lunch in a hurry.

A terrible picture, but an example of how thin your dough should be.


Almond Thins

3/4 cup almond flour
2 teaspoons granular Splenda (You can use liquid, but it doesn’t blend as well. I’ve found a few extra sweet crackers as a result)
1 egg white
3/8 teaspoon salt
1/8 teaspoon garlic powder
1/8 teaspoon onion powder

Preheat oven to 325 degrees.

Mix everything together well in a small bowl

Rip out two sheets of parchment paper. Lay one piece down on the counter, and coat the second piece with oil. Almond flour dough is incredibly sticky, and without the oil you won’t be able to peel off the parchment paper without taking your crackers with it. Place the dough in the middle of the unoiled parchment paper and place the oiled piece on top. Using a rolling pin, spread and level out the dough to about 1/8” thickness. Remove the top piece of parchment paper and using a greased pizza cutter, cut squares into the dough.

Place the parchment and dough onto a cookie sheet and bake for 10-20 minutes until the crackers are golden brown. They all finish at different times, so you’ll want to keep a close eye on them after 10 minutes. I often have to take a few crackers off using a spatula and continue baking the rest several times throughout the process.  Break them apart on the score lines and let cool. They will keep for over a week in an airtight container.

Sunday, January 8, 2012

Brasato al Barolo

After a whirlwind Christmas weekend, my husband and I were looking forward to a quiet New Year’s Eve at home. Making a special meal together sounded like the perfect way to celebrate. We took a trip down to the local butcher and found a nice looking bone-in chuck roast. With the help of the internet, it didn’t take long to figure out what to do with it.

The recipe I found was almost a year old but had just shown up in my Google Reader as one of The Beantown Baker’s top recipes of 2011, and it’s clear why it made the list. One sentence of the description stood out: “Cooking some beef in red wine for four hours couldn't possibly have bad results.” She was right.
In place of the Barolo wine called for in the recipe, I chose a large bottle of Yellowtail Cabernet, with the added bonus that there was extra for drinking while the roast cooked. We were also missing a few ingredients and had to improvise a bit.

After spending a few hours cooking in the wine, the roast had taken on an impressive purple color but the meat was somewhat bland by itself. The deep, rich flavor of the finished dish all comes from the sauce. It’s quite sweet but not overpowering. Despite the name of this blog, we served it with a side of mashed potatoes, an occasional treat for us in an otherwise mostly Paleo diet.


Brasato al Barolo (Beef Braised in Wine)
adapted from The Beantown Baker, originally from Emeril
Serves 4-6 

1 (3-pound) beef chuck roast
Salt and freshly ground black pepper
3 slices bacon, diced
1 yellow onion, chopped into fingernail size pieces
15 mini carrots, halved
4 celery stalks, chopped same as onion
5 cloves garlic, minced
4 1/2 cups (1 1/2 bottles) Cabernet Sauvignon, or other dry red wine
2 cups chicken stock
1/2 teaspoon dried rosemary
1/4 teaspoon dried crushed bay leaves
1/4 teaspoon ground cinnamon
2 tablespoons rice flour

Preheat the oven to 325 degrees.

In a large Dutch oven (oven safe), cook the bacon until done. Remove with a slotted spoon leaving the grease in the pot. Sprinkle the roast with salt and pepper, and place it in the pot and cook, turning every couple minutes to brown on all sides. Remove roast from the pot. Put the onions, carrots, celery and a pinch of salt into the pot, adding more bacon grease or other cooking fat if needed. Cook the vegetables until softened a bit and starting to brown, about 15 minutes. Add the garlic and cook until fragrant, about 30 seconds. Return the bacon and beef to the pot and add the wine, stock, rosemary, bay leaves and cinnamon. Bring the liquid to a simmer over medium-high heat, then cover and transfer the pot to the oven.

Cook in the oven, turning the roast once midway through, until fully tender and meat is starting to fall apart, this took about 3 hours for ours. Remove the meat from the pot and tent with foil to keep warm.

Place the pot over medium-high heat and bring to a boil. Cook about 10 minutes. Ladle some of the hot sauce into a small bowl. Whisk in the rice flour then stir the slurry back into the pot. Cook another 10 minutes or until the sauce has thickened. Adjust the seasoning to taste and turn the heat off.

Place meat onto a platter and thinly slice or shred. Serve the beef ladled with the sauce.